Currently, every day the number of adherents of a healthy diet is growing, and therefore discussions about the benefits and dangers of foods sometimes reach the point of absurdity. The main product of the food chain - bread - did not go unnoticed. A huge number of "horror stories" appeared on the Internet about the irreparable harm that ordinary yeast bread does to our health and the indescribable benefits of the so-called "yeast-free" bread baked with sourdough.
We will first examine what is true and what lies and fiction in this statement, and then consider several recipes for baking homemade yeast-free bread.
So what is more useful - regular or yeast-free bread?
Here we must immediately make a reservation: the very concept of "yeast-free" bread is absurd. Such a product cannot exist, since the starter, which is prepared within 5-7 days, in fact, is nothing more than a normal yeast culture. The fact is that yeast in nature occurs naturally in more than 1.5 thousand different products: on the surface of fruits (especially grapes), hop cones, vegetables, cereals, dairy and sour-milk products, and even in the surrounding air. In order for them to wander and multiply, special conditions are necessary - moisture, heat and sugar (fungi are real "lovers" of sweets).
Growing sourdough at home, bakers simply create the conditions for the growth and reproduction of yeast fungi, which then form the basis of dough for bread dough. And only thanks to them the home-made steamed bread turns out so magnificent and tasty. Justification for starter lovers can only be the fear that in industrial yeast GOSTs allow the content of various chemical additives to ensure the shelf life of the product. But to believe that GOST allows the content of sulfuric and hydrochloric acid in pressed yeast is at least not serious: yeast is a living culture that cannot survive in hydrochloric acid. It is sometimes possible to believe different rumors, but not to such an extent!
Shatter the last myth about the benefits and harms of yeast-free bread: yeast, supposedly, negatively affects the intestinal microflora, causes fermentation and bloating in the intestines. Yeast fungi, like a living culture, begin to multiply actively at a temperature of 30-32 ° C, but at t + 60 ° C they already coagulate, that is, they die, turning into an ordinary protein. And, since the temperature of baking any bread - both yeast and yeast-free - is at least + 200 ° C, it is clear that there is no question of any yeast in the finished bread.
What determines the quality of bread
In fact, the benefits and harms of yeast-free bread (as well as ordinary bread) lie in the quality of the flour used for baking. The whiter and gentler the refined flour to the touch, the less useful carbohydrates in it - fiber and cellulose, and the more simple, useless fast-digesting carbohydrates and starch. Accordingly, white bread is more high-calorie and recover from it faster.
Whole grain wholemeal flour contains healthy carbohydrates. The most ideal option is to grind whole grains in a home mill. This is the only way to be sure that there will be no harmful impurities in the bread - this is precisely the use of homemade yeast-free bread.
Manufacturers of bakery products use various additives, baking powder, which increase the shelf life of the product, "improve" the taste, harming the health of consumers. And yeast is not the most harmful component of ordinary store bread. Therefore, to be sure of the high quality and benefits of this essential food product, you need to stock up with good whole grain flour (wheat, rye or a mixture of them) and use one of the recipes below.
Universal sourdough
So, in order for the dough to be magnificent, it rises well, the bread dough is prepared with leaven. There are many recipes for its preparation, but the principle is practically the same. Consider a universal recipe that is suitable for any home baking: bread, rolls, cakes, oven pies and pies fried in a pan.
The main thing is to create ideal conditions for fermentation and wait enough time for the sourdough to mature. If it is supposed to bake bread often (even every day), then it is better to take larger dishes immediately - for example, a 2-liter jar.
Ingredients:
whole grain flour (preferably rye) - 100 g;
warm water - 100 g;
sugar or honey - 1 tablespoon.
Sourdough cooking
1. Mix warm water with sugar or honey.
2. Pour flour into the jar, and then gradually add the liquid mixture, mixing thoroughly so that no lumps remain. It may take a little less liquid (depending on the quality and properties of the flour). In this case, you can not use the whole mixture or add some more flour. The consistency should be as for a test for pancakes.
3. Cover the jar with a cotton napkin or gauze in 4 layers to provide air access to the sourdough and put in a warm place.
4. A day later, add another 100 g of rye flour and 100 ml of warm water to the sourdough, mix everything thoroughly, cover, put in a warm place.
5. On the third day, the fermentation process should already be clearly visible - the starter is bubbling, emitting carbon dioxide, and a pleasant slightly sour bread smell emanates from it. It again needs to be fed with a standard amount of flour and warm water, and you can already add white whole wheat flour, especially if you intend to bake wheat bread. You can add a spoonful of sugar or honey to feed the fungal culture, so that the fermentation process goes more vigorously.
6. On the fourth day, the leaven is considered finished and you can already put the dough on it. To do this, use part of the "domestic yeast", and the remaining part is again fed with flour, water, a small amount of sugar and left for 2-3 hours in a warm place. Then the leaven can be removed in the refrigerator for permanent storage.
Before each baking, the necessary part of the starter culture must be removed from the refrigerator in advance, so that it has time to warm up to room temperature, and then use it for sparing. The rest add flour, water, a little sugar, let stand for an hour or two, and put in the refrigerator.
The classic version of making yeast-free bread at home. Step by step recipe.
Ferment should be at least a quarter of the total amount of dough. Therefore, to bake one loaf of bread you need to immediately take the necessary part of the leaven and prepare the dough. If you plan to bake a large amount of bread (3-4 loaves), you can first make a dough to save the product from the sourdough. Usually it takes 3.5-4 hours, so it’s best to put the dough in the evening and in the morning to knead.
Servings Per Container: 3-4 loaves of bread weighing 800-1000g.
Time for preparing: about 10 hours.
Composition and calories per 100 g of product:
• proteins - 9g;
• fats - 3.3g;
• carbohydrates - 48 g;
• calorie content - 259 kcal.
Step 1 - prepare the dough. 250-300 g of starter culture is poured into a container, 2 cups of rye flour or a mixture of rye and first grade flour, 250 ml of warm water (t 32-35 ° C), 1 tablespoon of sugar, 1 teaspoon of salt are added. All mix well, the dishes are tightly closed with a lid and cleaned in a warm place for 3-4 hours. During this time, the volume of dough should increase by 2-2.5 times.
Step 2 - kneading the dough. Spread the dough in a container for dough, add 1.5 kg of flour or a mixture of various varieties as desired, mix a little and gradually add warm salted water (approximately 700 ml + 1 table. Tablespoon of salt). The dough should turn out a little denser in consistency than on pancakes, evenly mixed, without lumps, viscous and elastic.
IMPORTANT! Too dense dough will take longer to come up with, and bread will turn out to be less porous, the crumb will be dense and will become stale faster. Light, semi-liquid dough will make airy, porous bread.
Step 3. The finished dough is laid out in molds, previously generously greased with vegetable oil. The surface of the dough can be smoothed with a spoon moistened with water. Forms should be covered (with a lid, cling film, plastic bag) and put in a warm place for 3-4 hours, so that the dough rises well, the volume increased by 2 times.
Step 4 - directly baking. The oven must be preheated at a temperature of 150-180 ° C. The bread baking time depends on the size of the mold: if the mold is tall and narrow, you will have to bake about 2-2.5 hours at a temperature of 150 ° C. Willingness to check with a wooden skewer. If the form is wide and flat, the baking time will be reduced to 1.5 hours.
The finished bread is removed from the mold and covered with a towel until completely cooled.
A quick recipe for delicious bread
Cooking time can be significantly reduced, and this does not affect the quality of the finished fragrant bread. The proportions for the preparation of the dough to use the same, only the process of preparing the dough is omitted.
300 g of starter culture are diluted with warm water, sugar, salt, flour are added and the dough of the desired consistency is kneaded. The forms are generously greased with oil, the dough is laid out and sent to a warm place to approach. Heat is a necessary condition for obtaining a good, magnificent dough. Although home-made bread is commonly called “yeast-free”, the yeast, being a natural yeast culture, needs heat, moisture and sugar for growth and reproduction. Without them, the dough will turn out to be too fresh, non-porous and tasteless.
Bake bread as described in the previous recipe.
Useful tips from experienced bakers
The process of baking homemade bread only at first seems rather laborious, but with the acquisition of the necessary skills, everything becomes easy and affordable. The most important thing is to use proven high-quality flour without harmful impurities. Natural healthy bread should not be white, even from wheat flour.
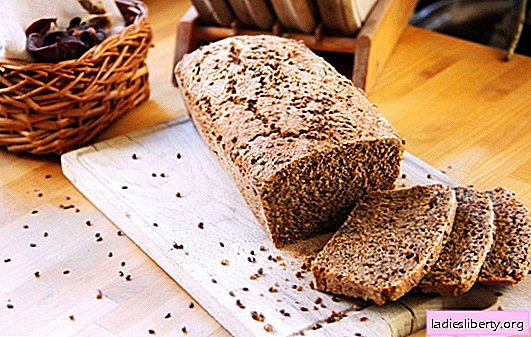
1. You can improve the taste of your favorite product by adding various fragrant spices - coriander, caraway seeds, cinnamon, raisins, nuts, powdered or whole milk, curd whey, oatmeal, sesame seeds. If you add bran (coarse fiber), they will help cleanse the intestines of toxins and harmful impurities, in addition, sharply reduce the calorie content of bread.
IMPORTANT! Often on the Internet you can come across a “useful” tip - add flaxseed to the dough. This can not be done in any case - flaxseed and oil can be used EXCLUSIVELY only in cold form. When heated in flax products, very strong carcinogens appear, which provoke the growth of cancer cells and other dangerous diseases.
2. A few ordinary vegetable oils can be added to the dough to give plasticity and softness.
3. The test can be prepared immediately in large quantities - for 4-5 loaves of bread, but bake 1 pc per day, and the rest of the dough is perfectly stored in the refrigerator for up to 3 days without loss of taste and quality.
Homemade yeast-free steamed bread is indeed a healthy and tasty product. Learn to bake it, delight your family and loved ones with a healthy healthy food.