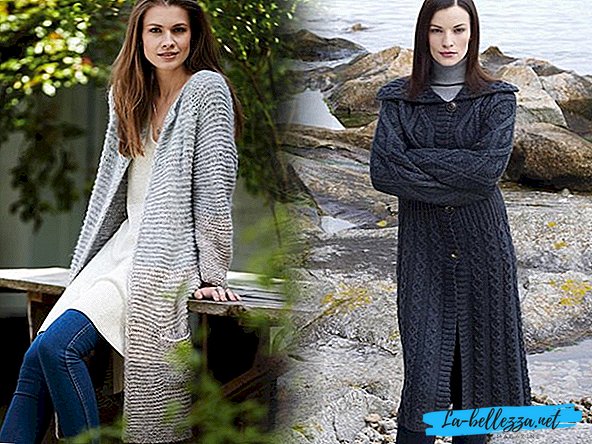
No fan of what style you would be, knitting a coat with your knitting needles will always be a great idea, because the infinite number of models of this warm piece of clothing allows you to adhere to both the classic style and add to the image of romance and sensuality, and how casual this casual style is in casual style!
Knitting coat can be, in the literal sense, for every taste and color. This means only one thing: to learn how to knit a coat with knitting needles is the must do of this season. And doing the coat with your own hands is a very interesting job that requires attentiveness and commitment.
Our article will help to cope with this task, in which we consider in detail several interesting and simple options for knitting a coat with knitting needles with step-by-step analysis of diagrams and descriptions. We will learn how to knit beautiful and simple coat patterns not only for girls and women, but also for girls.
Knitting coat - schemes and description

Before you knit this warm product made of yarn with knitting needles, you should determine the main direction of the style of the future coat, texture, pattern, flowers. There are an incredible variety of options offered by various knitting magazines and the Internet, but in order to like a coat and really want to wear it, you need to think in advance what you can wear with it, whether it will be a good cut for your type of figure, for what time of year it is intended and from what yarn to knit it.
The future coat can be made in the form of a jacket, cardigan, poncho, coat with a hood, can be short or long, made simple viscous or combine several interesting and complex patterns. Consider different options for outerwear, and a knitting pattern with a knitting coat will help determine how this garment is right for you or the child for whom you have conceived to knit a warm product.
Fashion model for a woman
It may seem that knitting a coat with knitting needles for a woman without a lot of knitting experience is almost impossible task, but this is not at all the case. It is only necessary to choose a simple model with a simple monotonous pattern, and everything will definitely work out, the main thing is to follow the instructions and the scheme.

Dimensions
36/38 (40/42) 44
Instruments
- yarn (55% alpaca, 35% cotton; 10% sheep wool; 110 m / 50 g) - 550 (600) 650 g light blue;
- Knitting needles number 6;
- hook number 5.
Knitting patterns for schemes
Patent pattern
The number of loops should be odd = 1st row: remove 1 loop with 1 nakida, as in purl knitting, 1 face loop, from * repeat continuously, finish: remove 1 loop with 1 nakida, as in purl knit.
2nd and 4th rows: * 1 knit a loop together with the previous row of the front row, 1 remove the loop with 1 double stitch, as when wearing a knit, from * constantly repeat, finish: 1 stitch the loop with the previous row of the front row.
3rd row: * 1 remove the loop with 1 nakida, as when seam knitting, 1 knit the loop of the previous row, knit together the front one, from * constantly repeat, finish: 1 loop with 1 nakida remove, as with seamic knitting.
In the height of 1 times knit 1-4th rows, then constantly repeat the 3rd and 4th rows.
Knitting density
11.5 p. X 31 p. = 10 x 10 cm. Ensure that only the loops of each 2nd row are visible on the patent pattern.
Pattern

Working process
Back
Dial 69 (73) 77 loops and knit with a patent pattern.
For bevels of shoulders through 72.5 cm = 224 rows from a dial-up row on both sides close 1 x 3 p., Then close in each 2nd row 10 x 2 p. (2 x 3 p. And 8 x 2 p.) 4 x 3 p. And 6 x 2 p.
At the same time, for the neckline cut, after 78 cm = 242 rows from the dial-up row, close the average 13 points and finish both sides separately.
For rounding the cutout on the inner edge, close in each of the following 2nd row 1 x 3 p.
Through 79.5 cm = 246 rows from the dial, close the remaining 2 points of the shoulder on each side.
Left and right shelf
Dial 37 (39) 41 p. And knit patent pattern.
Bevel the shoulder along the right edge, as on the back.
At the same time, to cut the neckline through 75.5 cm = 234 rows from the dial-up row on the left working edge close 1 x 5 p., Then close 2 x 2 p. And 3 x 1 p. In each 2nd row.
Right shelf knit symmetrically left.
Sleeves
Dial 21 (25) 29 p. And knit patent pattern.
At the same time for bevels from a dial-up row on both sides, according to the figure, add in each 14th row 9 x 1 p. = 39 (43) 47 p.
After 45 cm = 140 rows from the dial, close all loops.
Assembly
Run shoulder seams. Neckline crochet 1 next to Art. b / n Sew the sleeves, complete the side seams and the seams of the sleeves.
Baby coat with a hood for girls
Not only adults can enjoy beautiful handwork, because you can create beautiful baby coats with knitting needles. To please girls and boys with such things is not difficult, because tying a coat for children is much faster, while no one in this matter has canceled a dive into the interesting process of work. Consider in this article a closer version of the implementation of the coat with knitting needles for a girl with a hood.

Dimensions
The length of the finished jacket 38 cm, EG = 59 cm. Suitable for three years.
Instruments
- Yarn: Teddy's Wool Golf, 100% acrylic;
- Spokes S.5, 4, 5;
- 3 decorative buttons;
- 3 pairs of transparent buttons.
Patterns
- shawl surface;
- gum 1 × 1;
- gum 2x2;
- spit of 9 p (see diagram 1);
- "Italian set".
Knitting density
10x10 cm shawl smoothing = 16 p. To 28 p.
Knitting patterns

Knit back and shelves
The back and both shelves knit a single cloth to armholes. On the spokes 4, dial the Italian set of 145 loops, while instead of the usual 4 p. knit hollow cutters only 2. After this, go to the knitting needles 5 and knit a scarf stitch until the web reaches 19 cm.
In the next front row, perform 4 opposite folds under the scheme 2. To knit the purl row with the front ones, tightening the hinges of the loop with a warehouse.
From the next row knit gum 1 × 1, starting and ending or. n. excluding edge. All 8 rows.
After that, knit the garter back again, while placing the braid over each fold (Diagram 1) thus:
Edge, 5 persons, add a loop from the broach, 9 braid loops, add a loop from the broach, 17lit., Add a loop from the broach, 9 loops of the braid, add a loop from the broach, 15 faces, add a loop from the broach, 9 loops of the braid, add a loop from broach, 17 faces., add a loop from broach. 9 braid loops, add a loop from the broach, 5 faces, edging. Total on the needles 105 p.
Loops, added before and after each braid, knit so that they are on the front side of the back.
Knit this way 5 cm (14 p).
After that, divide the canvas into three parts, while closing for the armholes of 10 loops each. For each shelf there should be 17 p. Then you can knit simultaneously from three balls or finish each part separately.
17 cm from the upper edge of the elastic and to the shoulder, at the same time closing for the cutout from the inner edge of each shelf 1 × 3 p., 1 × 2 p. And 1 × 1 p. Close the shoulder for 11 stitches, retracing the other loops on extra needle or thread in a contrasting color.
Sleeves
On the needles 4, dial 36 loops and knit a 7cm rubber band 2 × 2. Continue knitting needles №5 shawl, adding in every 6th row 4 times 1 p. Along the edges.
At a distance of 9 cm from the gum knit:
Edge 15 faces, add a loop from the broach, 9 loops of the braid, add a loop from the broach, 16 faces, edge.
At a height of 23 cm from the elastic close 1 time for 3 p., 2 times for 2 p. And at the total height of the sleeve 36 cm close the remaining loops.
The second sleeve is knit similarly.
Hood
Re-loop the neck loops on the needles 5 and knit a scarf stitch. adding on both sides of the central loop 4 times 1 p. Next, knit straight. At a height of 23cm, fold the canvas in half and close the hinges with the third needle.
Assembly
Run shoulder seams, sew the sleeves and stitch them into the armholes.
Along the edge of the first shelves, the hood and the second shelves, loop around the loops with 3.5 knitting needles and knit 4 cm with an elastic band 2K2. Then close the loops of the strap with a needle, adjusting the density of the edge. Sew decorative buttons and transparent buttons on the inside.
Women's product from thick yarn
There is no thing more pleasant and beautiful in the period of autumn and spring cold, than a coat of thick yarn knitted with your own hands. And it is not at all necessary that it will be “rough”, it is quite possible to make it airy and gentle, especially with the help of large knitting needles of various sizes. Let's take a closer look at such a knitted coat with knitting needles from thick yarn with diagrams and descriptions. It is made of fringed melange yarn.

Dimensions
36/38 (40/42) 44/46
Instruments
- yarn (38% natural wool, 33% polyacryl, 29% polyamide; 175 m / 150 g) - 750 (900) 1050 g of white-gray sectional dyeing;
- circular needles number 8 and 12;
- pearl buttons (diameter 34 mm).
Knitting patterns for schemes
Three Loop Patent Edge
Facial rows: at the beginning of a row, knit 3 loops with facial loops, while tightening the thread after securing the 1st loop, remove 3 loops at the end of the row, like purses, with the thread at work.
Purl rows: at the beginning of a row, knit 3 loops with purl, while tightening the thread after securing the 1st loop, remove 3 loops at the end of the row, like purl, before work.
Main pattern
Odd number of loops.
Facial rows needles number 8: all the loops knit purl.
Purl rows with needles No. 12: alternately 1 face, 1 purl, finish 1 face.
Knitting density
10 p. X 15 p. = 10 x 10 cm; Pattern 1 - 3 n. = 1.5 cm, connected by the main pattern.
Important:back and shelves to armhole knit a single cloth on alternating circular needles in rows in the forward and reverse direction. Then finish the parts separately.
Pattern

Working process
Back and shelves
On the needles No. 8, dial 121 (129) 137 loops with a cruciform dial and knit the main pattern between the patent edges.
Important
Between the patent edges, the outer parts of 31 (33) 35 sections form shelves, the middle ones 53 (57) 61 sections - the backrest.
After 21.5 cm = 32 rows from the initial row, perform in the right shelf 1 a pair of button holes. To do this, knit 2 loops in the front row after the patent edge, then knit 2 loops together on the front and make 1 nakid, knit 10 loops, 2 knit the loops together on the front and make 1 nakid. Nakida in purl row to knit acc. patterned.
Perform a second pair of buttonhole holes in 13.5 cm = 20 rows in the same way.
For a lapel after 40 cm = 60 rows from the initial row, add on both sides after and in front of the patent edge, respectively, 1 face cross of a transverse thread and include in the pattern. Repeat this increase 19 more times in each 2nd row.
Through 56 cm = 84 rows (53.5 cm = 80 rows) 50.5 cm = 76 rows from the initial row, i.e. after 12 (10) of the 8th extension for the lapel, on the needles a total of 145 (149) 153 loops. Then finish the parts separately.
The upper part of the right shelf with sleeves
On the first 46 hinges continue to work according. the pattern, the remaining loops to leave and on the right edge continue to carry out increases for the lapel.
At the same time, in the 1st row from the division of work, type 38 new loops for the knitted sleeve along the left edge, including the first 35 points to include in the main pattern, the remaining 3 points to knit with the patent edge. After the last increase for the lapel, the total number of loops will reach 92 (94) 96 p.
To cut the lapel through 66.5 cm = 100 rows from the initial row, close 13 loops using a hollow-cord (i-cord) technique as follows: * knit 2 loops of pattern 1 with facial ones, knit the 3rd loop with the next loop together with the front one with a tilt to the left (Remove 1 loop, as front, 1 face, then stretch it through the removed loop), return the 3 loops of the patent edge to the left needle, repeat * 9 times from *, then close the 3 loops of the patent edge, as facial loops.
At the end of the next purl row, collect 13 new loops and continue working with the patent edge according to patterned.
After 76 cm = 114 rows from the initial row, continue work only on the loops of the patent edge and the first 34 (35) 36 loops for the back of the collar acc. pattern, the last 52 (53) 54 p. + 3 p. of the patent edge to leave for the line of the shoulder / sleeve.
After 9.5 cm = 14 rows (10.5 cm = 16 rows) 12 cm = 18 rows from the start of knitting the collar, leave the loop.
The upper part of the left shelf with sleeves
Knit the same way as the upper part of the right shelf, but in mirror image and without holes for buttons, to cut the lapel in the 100th row from the initial row (= purl row) to close the 13th paragraph as follows: * 2 knit the loops of the paired edge with the wrong side , Knit the 3rd loop with the next loop together with the purl, return the 3 loops of the patent edge to the left knitting needle, from * repeat 9 more times, then close the 3 loops of the patent edge, as facial loops. These 13 loops re-dial in the next front row.
Upper back with sleeves
Dial 38 loops on the spokes on the front row of the front of the right sleeve, then knit 53 (57) 61 p. Backs and dial 38 loops on the initial row of the front of the left sleeve 38 (129) 137 p.
Continue to work according to pattern with a patent edge on both sides, while starting with 1 purl row.
After 76 cm = 114 rows, leave loops from the initial row, while the average 19 (21) 23 sections form the neck, the outer parts of 52 (53) 54 paragraph + 3 paragraphs of the patent edge form a shoulder / sleeve line.
Assembly
For the shoulder seams and the seams of the sleeves, the back and the shelves should be folded inward, and the left shoulder / sleeve loops are parallel to each other on separate needles. Start from the right edge: knit 55 (56) 57 x 2 p. (1 p. With each knitting needle) together front and close; for the neck of the back rest close the next 19 (21) 23 p. Separately, then re-fasten 55 (56) 57 x 2 p. Together front and close.
The left collar loops should be knitted with a knitted stitch and sewn into the collar. Sew buttons on the left shelf.
Video lesson
It would be a good idea to view several master classes from professional knitters just before starting work on a coat, because this business has its own secrets that needlewomen from all over the world share in their video tutorials. This simple step will greatly facilitate the progress of work and accelerate the appearance of the finished product, made by his own idea.
Video lesson "how to tie a coat with needles"


