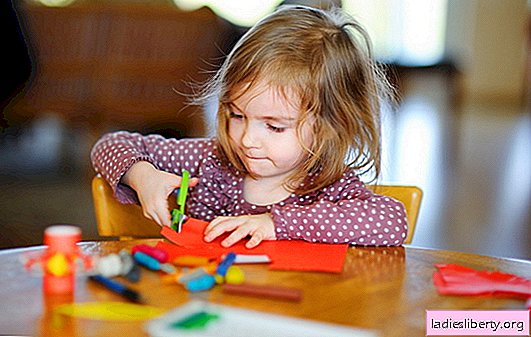
It is nice to receive gifts, but no less nice to give them.
Especially if you do crafts for mom with your own hands.
Many of us, as a child, launched boats in puddles or airplanes into the sky.
And few knew that this was the ancient Japanese art of origami.
From simple sheets of colored paper, working in the technique of modular origami, you can make amazingly beautiful balls of kusudama.
In this case, we need several sheets of color, preferably double-sided, paper, a ruler, a simple pencil, scissors and glue.
How to make DIY kusudama balloon for mom do it yourself
We draw a sheet of paper into 7 x 7 cm squares and cut it. The size of the squares can be chosen arbitrarily, but keep in mind that the larger the workpiece, the more the ball will turn out and the more difficult it will be to place it in the interior. Five squares are needed per module, that is, the total number of blanks should be divided by five.
Fold the sheet in half diagonally and bend the corners towards the center.

We turn them to the sides. We straighten the folds of paper on both sides and bend the corners. Remember to iron the folds carefully.

Next, close the folds. Now gently grease the sides of the workpiece with glue and glue it. We should get such a small module.

We glue together the five modules obtained and wait for the workpiece to dry.
Using glue, we connect the modules into a flower. The core can be decorated with a bead, rhinestones, paper fringe.
We make a ball by gluing the required number of flowers-modules. To facilitate the process, you can initially string the modules on a string. This ball used 12 blanks. You can use paper of one color or different, as your fantasy tells you. In ancient Japan, girls made balls of thin white paper and used them as a wedding bouquet. Items made of two-color paper look very impressive: the middle of them is one color, and the petals are of another. In order for the ball to be suspended, attach the ribbon or thick thread to the center when gluing the parts.

Other DIY paperwork for mom
Of course, in addition to a ball of kusudama, many more interesting crafts can be made from multicolored paper. The ancient art of quilling or paper rolling will help us with this. This method of manufacturing postcards or bulk products from thin paper strips has been known for a long time. In ancient times, monks made of light paper with gold trimmings made light openwork jewelry of amazing beauty. We need to purchase special quilling paper in a stationery store or a creative store. We also need a device for work that you can buy there, but you can use a thin knitting needle or a toothpick. We will also need glue for paper and color cardboard, which will serve as the basis for future postcards.
Tightly wrap a strip of paper on the quilling fixture. Glue the tip and carefully remove the workpiece.

Colored strips can be used to make blanks of different sizes and very different shapes. We also wind the paper, but do not glue it immediately, but remove it and slightly dissolve it. Now we glue the tip of the strip and use our fingers to form a variety of blanks: an eye, a muzzle with ears, a fish, a tulip.
If you turn the device for quilling in different directions, you get a completely different, but very interesting blank with a wavy center or edges. From such strips you can make a frame for a card or photo, make a congratulatory inscription.

Now we take cardboard, which will serve as the basis for DIY crafts for mom. It can be a postcard - congratulations on March 8, happy birthday, Valentine's Day, Happy New Year or just a beautiful picture.
Round blanks will become the core of flowers, round ones will become petals, long ones will become leaves. We glue the back side of the twisted strip with glue and firmly press it to the cardboard. Next is the turn of the petals. The trunk and leaves are made of green stripes. We place our bouquet in a vase. You can show imagination and make a beautiful frame or a congratulatory inscription from stripes. Work in the quilling technique allows us to produce not only flat postcards and paintings, but also three-dimensional three-dimensional products: vases, caskets, Christmas-tree decorations.

Another interesting technique for working with paper, which produces original crafts for mom with her own hands, is called trimming. This is also quite an ancient and famous way of needlework. We will need multi-colored corrugated paper sold in office supplies, baseboard, pencil, glue and scissors. Crafts made in this technique are light, airy. If desired, dense multi-colored paper napkins can be used instead of corrugated paper.
We draw on a cardboard basis the alleged pattern: flowers, animals, Christmas tree, heart, initials. We cut the paper into small squares of about 1 x 1 cm. Tightly wrap the end of the pencil with a leaf, being careful not to tear it. Lubricate the end part with glue and press it to the cardboard base.

First you need to glue the paper sheets around the perimeter, along the drawn lines.
Next, fill the free space with leaves of the selected color. Gluing the blanks is not very tight, but not rare, so that the base does not shine through. A postcard or a picture is bright, cheerful and unusual.